
15 DIY Dry Creek Bed Drainage Solutions: Creative Approaches for Your Landscape
Water management presents a significant challenge for many homeowners.
When rain pours down, proper drainage becomes crucial to prevent foundation damage, landscape erosion, and unwanted pooling in your yard.
Dry creek beds offer an elegant solution that combines functionality with aesthetic appeal. These artificial waterways channel excess moisture away from critical areas while adding a stunning naturalistic element to your outdoor space.
This guide explores fifteen innovative DIY dry creek bed projects you can implement to address drainage issues while enhancing your property’s visual charm.
From basic weekend undertakings to more ambitious landscaping transformations, these ideas provide practical options for yards of any size and style. Let’s discover how functional water management can become a captivating focal point in your garden.
15 DIY Dry Creek Bed Ideas for Effective Drainage
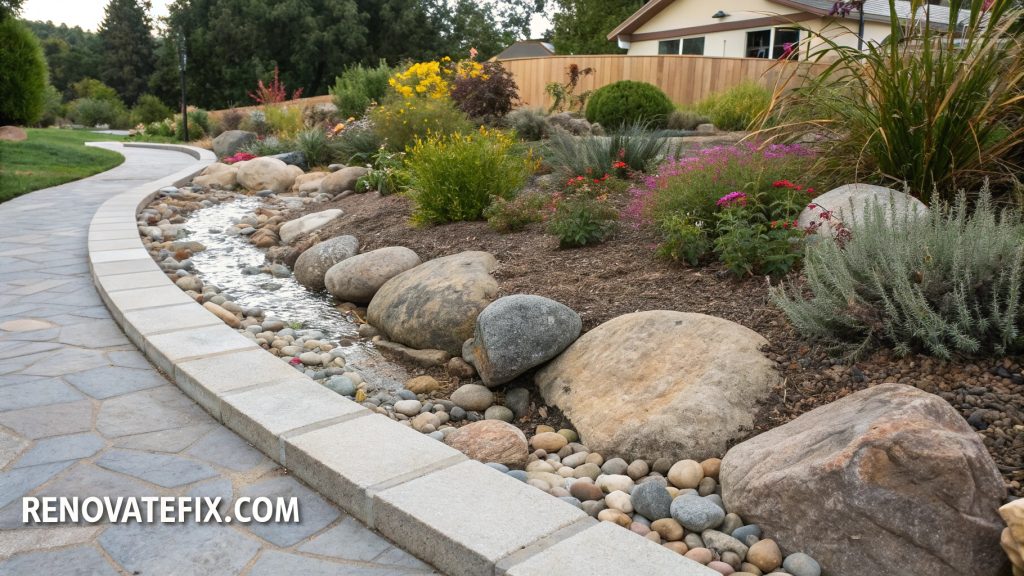
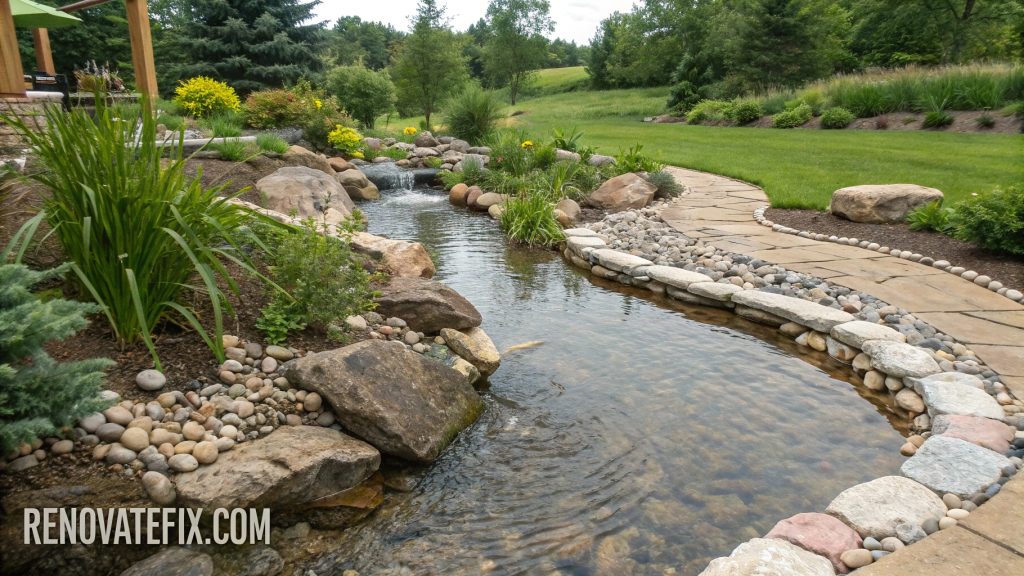
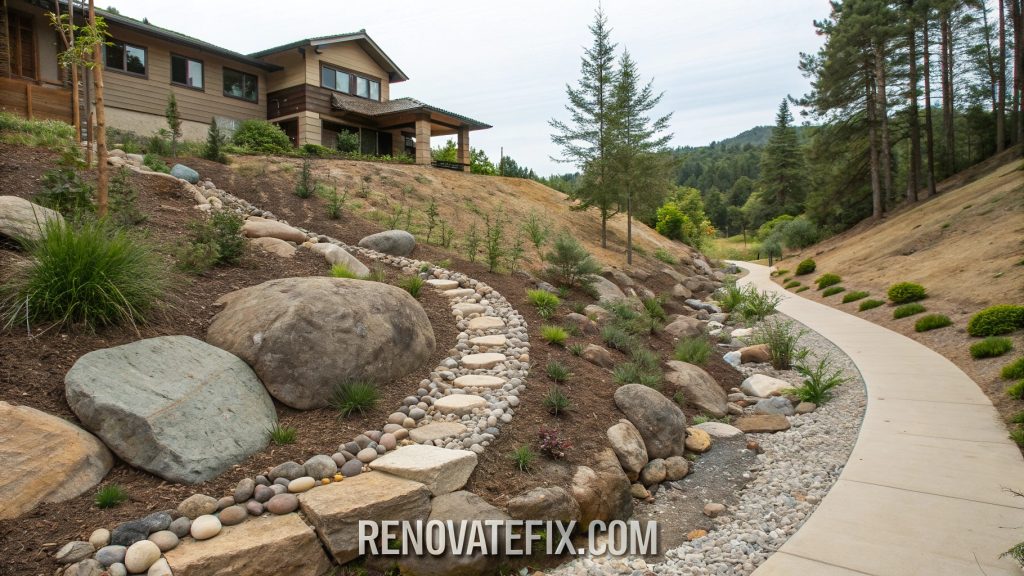
1. Curved Path Creek Bed
A gently winding creek bed mimics nature’s organic flow patterns while efficiently directing water away from structures.

Build your curved path using various sized river rocks, establishing deeper channels in the middle with progressively smaller stones toward the edges.
This approach creates visual depth while allowing substantial water movement during heavy rainfall, making it ideal for sloped properties needing strategic runoff management without compromising on aesthetic quality.
2. Stepped Cascade Design
For properties with significant elevation changes, consider implementing a stepped cascade design that manages water flow across multiple levels.

Construct small retaining walls from flat stones at various points along the descent, creating miniature waterfalls during rain events that slow momentum and prevent erosion.
Between each drop, form small basins lined with polished pebbles that collect water momentarily before it continues downward through your carefully crafted system.
3. Meandering Garden Border
Utilize a dry creek bed as a natural boundary between garden sections while addressing runoff concerns.
Position larger anchor boulders at key turning points to guide the creek’s flow, then fill between with graduated stone sizes – from cobbles to fine gravel.
Plant moisture-loving perennials along the edges that benefit from occasional water access yet withstand dry periods, creating a dynamic border that serves multiple purposes in your landscape scheme.
4. Rain Garden Connection
Connect downspouts directly to a specially designed creek bed that channels roof runoff into a depression planted with water-tolerant species.
Line this pathway with rounded stones arranged from largest at entry points to smallest in the collection basin.
During storms, water moves visibly through your artistic channel into the rain garden where native plants help with absorption and filtration, combining practical rainwater management with ecological benefits for local wildlife and groundwater systems.
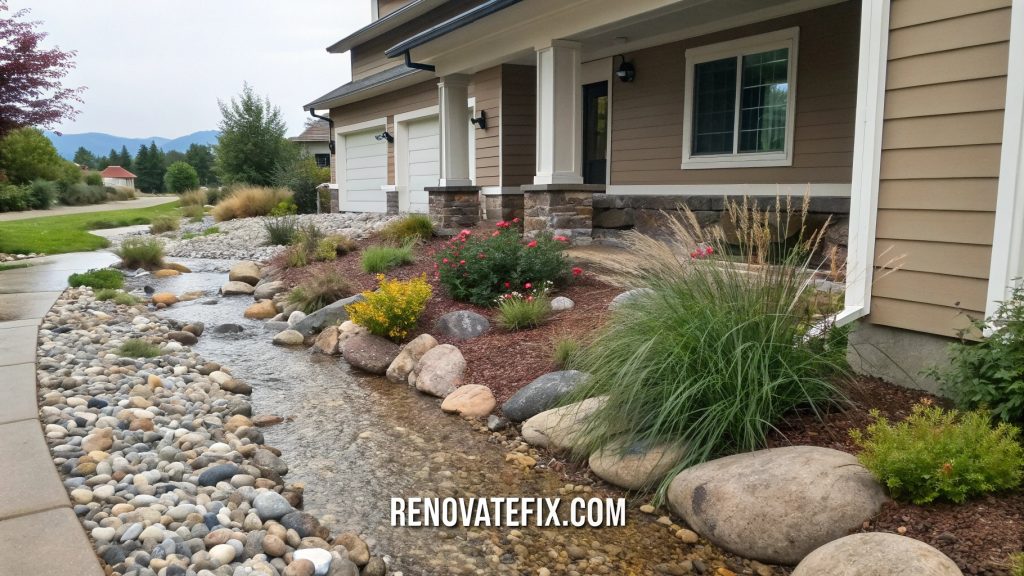
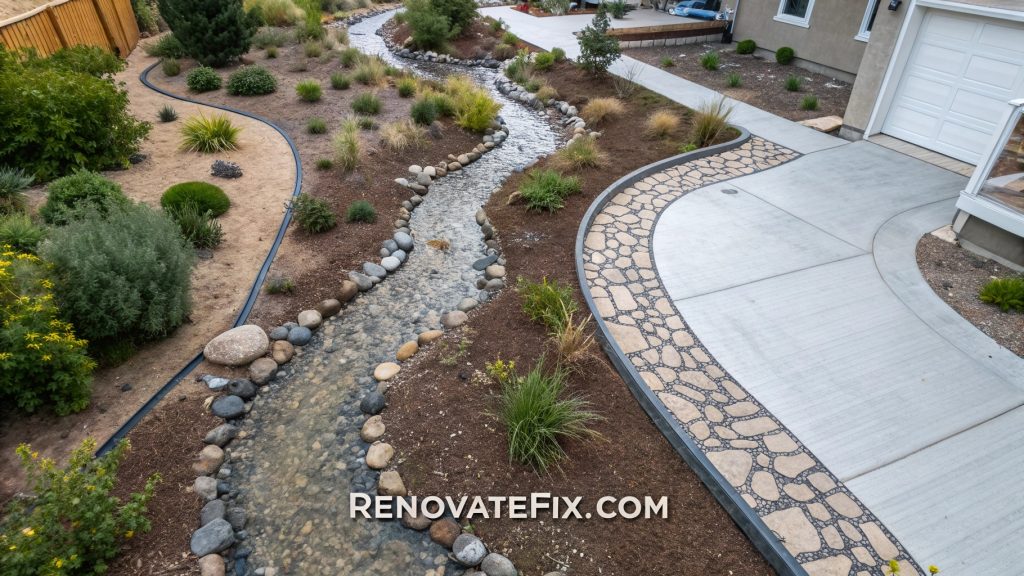
5. Front Yard Statement Feature
Create an impressive front yard focal point by constructing a wide dry creek that divides your entrance approach.

Use flat stepping stones strategically placed across the bed to form a pathway, surrounded by carefully arranged boulders and cobbles in complementary earth tones.
Add low-growing groundcover between rocks near the edges to soften boundaries while maintaining clear water channels through the center for functional drainage during rainfall events.
6. Woodland Edge Solution
For properties bordering natural areas, develop a rustic creek bed using locally sourced materials that blend with surrounding woodland aesthetics.
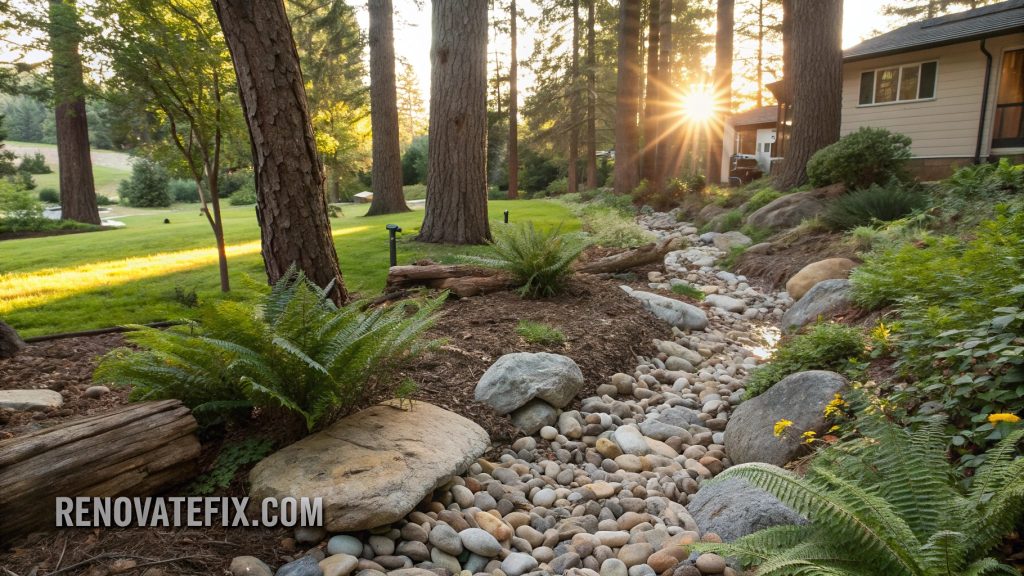
Mix weathered logs partially embedded among stones to mimic fallen forest elements while directing water flow.
Add native ferns and shade-tolerant woodland plants along margins where moisture occasionally accumulates, creating a transition zone between manicured lawn and wild areas that manages drainage while supporting local ecosystem diversity.
7. Arid Climate Rock Garden
Adapt dry creek bed principles for arid regions by constructing wider channels with capacity for occasional flash floods.
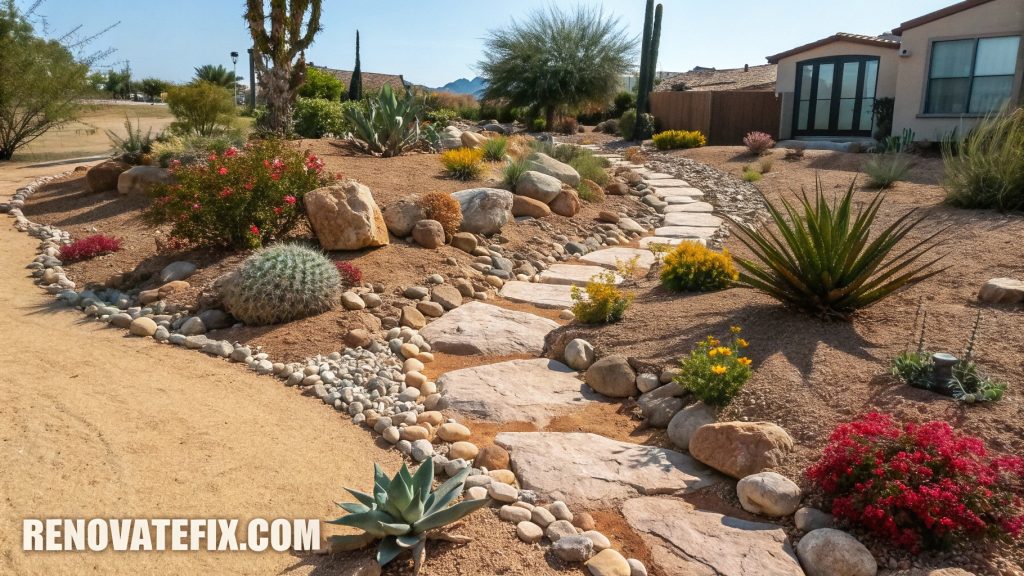
Select heat-resistant stone varieties in warm hues that complement desert landscapes, arranging them to mimic natural wash patterns.
Integrate drought-resistant succulents and native desert plants strategically above the flood line where they benefit from rare water events without risking root damage, creating an authentic southwestern drainage solution requiring minimal maintenance.
8. Swale-Creek Hybrid System
Combine traditional swale techniques with decorative creek bed finishing for maximum absorption and flow management.
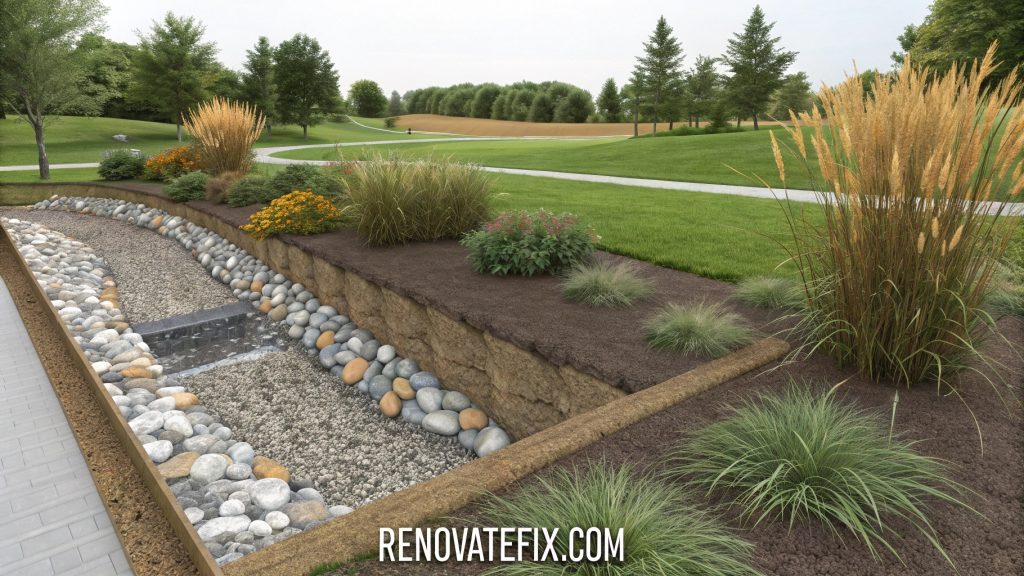
Excavate a gentle depression following contour lines across your property, then add a central stone-lined channel within this broader basin.
During normal rainfall, water slowly percolates through the entire swale width, while heavy downpours activate the central creek bed for rapid drainage, providing dual functionality through seasonal changes while maintaining an attractive landscape feature year-round.
9. Pond Overflow Circuit
Connect water features with an attractive dry creek bed designed to manage pond overflow during wet seasons.
Construct the bed with waterproof liner beneath stones to prevent unwanted seepage in key areas, guiding excess water away from your property.
Position moisture-loving ornamental plants strategically along this pathway where they’ll thrive from occasional water access, creating a unified water management system that appears as an intentional landscape design connecting various garden elements.
10. Pebble Mosaic Creek
Elevate your drainage solution with artistic expression by creating patterns within your creek bed using contrasting pebble colors and sizes.
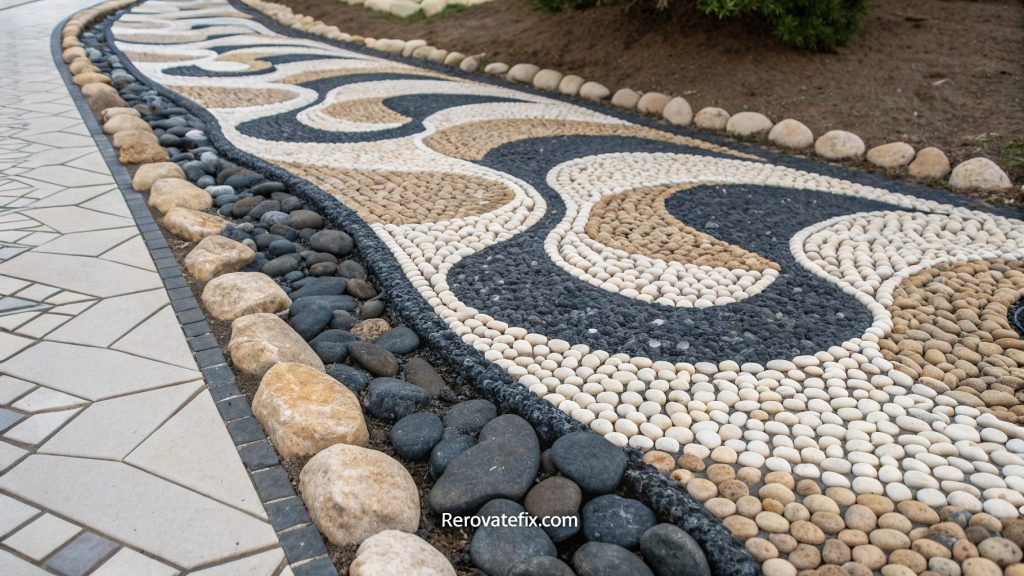
Arrange smooth stones in wave designs, spirals, or geometric forms that remain visible whether dry or wet.
Keep deeper central channels clear for maximum flow capacity while concentrating decorative elements along elevated edges where water rarely reaches, balancing artistic vision with practical function in this mosaic-inspired approach to water management challenges.
11. Split-Level Diversion System
Address complex drainage patterns by constructing a bifurcated creek bed that divides water flow between different property areas.
Engineer subtle grade changes that naturally direct water along two or more paths depending on volume, using larger boundary stones at division points.
Each branch features distinctive stone arrangements and plant companions suited to their specific moisture conditions.
Creating a comprehensive drainage network disguised as an intentional landscape design feature spanning multiple garden zones.
12. Gabion-Reinforced Channel
For areas with significant erosion concerns, incorporate gabion structures (wire cages filled with rocks) as reinforcement elements within your creek bed design.
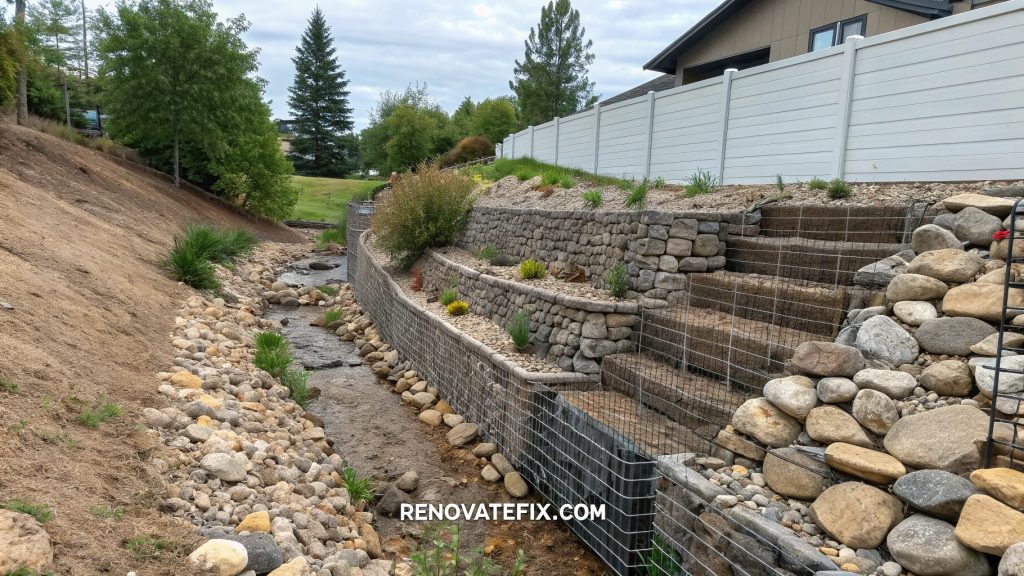
Position these engineered features at critical points where water velocity increases, creating stable anchors that prevent stone migration during heavy flows.
Between gabions, arrange loose river rocks in graduated sizes that complement the contained stone colors, blending structural requirements with aesthetic considerations for challenging slope conditions.
13. Courtyard Runoff Solution
Develop an intimate courtyard drainage system where hardscaping meets naturalistic elements through a narrow, precisely crafted creek bed.

Use uniformly sized smooth pebbles in a restrained color palette that complements adjacent paving materials.
Position miniature bridges or stepping stone crossings at access points, allowing convenient passage while maintaining visual flow through the space, perfect for small urban gardens or enclosed patio areas needing both practical drainage and artistic detail.
14. Erosion Control on Slopes
Combat hillside erosion by installing a zigzagging creek bed that slows water velocity while protecting soil integrity.
Position substantial boulders at each direction change to anchor the structure and force water to navigate a longer path downhill.
Between these turning points, create miniature detention areas using compacted gravel beneath surface stones, allowing momentary pooling that reduces momentum before water continues its controlled descent through your engineered system.
15. Seasonal Stream Simulation
Recreate a natural seasonal stream bed appropriate for properties experiencing periodic heavy flows followed by dry spells.
Excavate a deeper central channel lined with substantial rocks capable of withstanding strong currents, flanked by gradually elevated banks using progressively smaller stones extending outward.
During dry periods, this formation provides visual interest through texture and elevation changes, while effectively managing substantial water movement when activated by rainfall without disrupting your overall landscape design.
Conclusion
DIY dry creek beds represent a perfect marriage of form and function in landscape design.
Beyond solving critical drainage problems, these features add character, texture, and naturalistic beauty to outdoor spaces.
By selecting from these fifteen distinctive approaches, you can customize a solution perfectly suited to your property’s specific challenges and aesthetic preferences.
Remember that successful installation requires proper planning – considering water flow patterns, selecting appropriate materials, and integrating compatible plantings.
With thoughtful implementation, your dry creek bed will serve as both a practical water management system and a captivating landscape element that enhances your property’s visual appeal across all seasons.
Whether managing minor puddles or addressing significant runoff concerns, these creative strategies prove that effective drainage solutions need not sacrifice beauty for functionality.